OVM 3.1.1 password expiring ????

Apparently, after 180 days the Oracle XE database policies will expire the password for the OVM environment. To fix this, you need to logon as the oracle user:

su – oracle

Setup your environment variables

source /u01/app/oracle/product/11.2.0/xe/bin/oracle_env.sh

sqlplus

SQL*Plus: Release 11.2.0.2.0 Production on Tue Sep 18 10:34:34 2012

Copyright (c) 1982, 2011, Oracle. All rights reserved.

Enter user-name: ovs
Enter password:
ERROR:
ORA-28001: the password has expired
Changing password for ovs
New password:
Retype new password:
Password changed

Connected to:
Oracle Database 11g Express Edition Release 11.2.0.2.0 – 64bit Production


And while you are at it, disable the expiration of the Oracle Accounts.


[oracle@ovmm ~]$ source /u01/app/oracle/product/11.2.0/xe/bin/oracle_env.sh

[oracle@ovmm ~]$ sqlplus / as sysdba

SQL*Plus: Release 11.2.0.2.0 Production on Tue Sep 18 10:39:42 2012

Copyright (c) 1982, 2011, Oracle. All rights reserved.

Connected to:

Oracle Database 11g Express Edition Release 11.2.0.2.0 – 64bit Production

SQL> source /u01/app/oracle/product/11.2.0/xe/bin/oracle_env.sh

SQL> ALTER PROFILE DEFAULT LIMIT PASSWORD_LIFE_TIME UNLIMITED;

Profile altered.

SQL>

PXE boot and kickstart setup for OVM

This article show how to setup a complete PXE Boot environment to be used by any new server on your network.

First you will need to have an Apache or similar website.

 [stextbox id="black"]# yum install httpd
# chkconfig --level 345 httpd on
# service httpd start[/stextbox]

Next you will need to mount your media on that webserver
 [stextbox id="black"]# mkdir -p /var/www/html/OEL5.5[/stextbox]
You can copy files from your original ISO file or more impressively, 
you can mount your iso permanently. Modify your /etc/fstab like below:
/sw/download/oracle/oel5/Enterprise-R5-U4-Server-x86_64-dvd.iso	
/var/www/html/OEL5.5	udf,iso9660 user,loop	0 0

More to come...

How to setup VLANs on a Cisco SG 300-20 Managed Switch

This article will show how to setup a Cisco SG 300-20 switch to work on a home / office network.

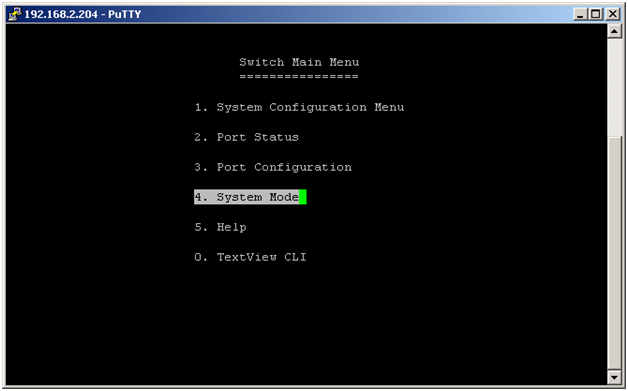
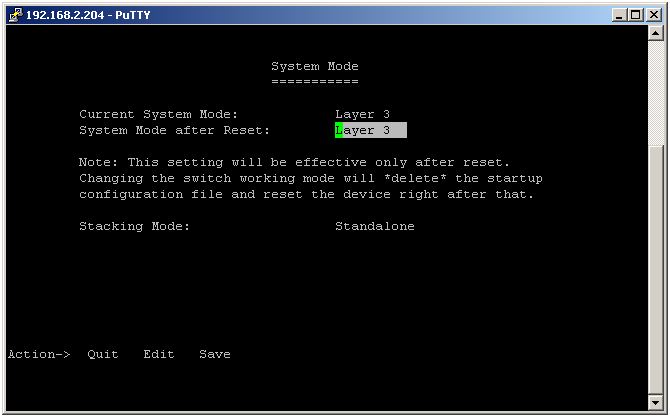
First of all you need to change your System Mode to Layer 3.

To get to the Console,  you can either use the provided serial cable and login with the default userid/pw, or by enabling SSH.

Choose System Mode

Choose Edit, then hit your space bar to toggle the Layer 2 over to Layer 3. Save that and reboot. Important – This will erase everything so backup or make notes


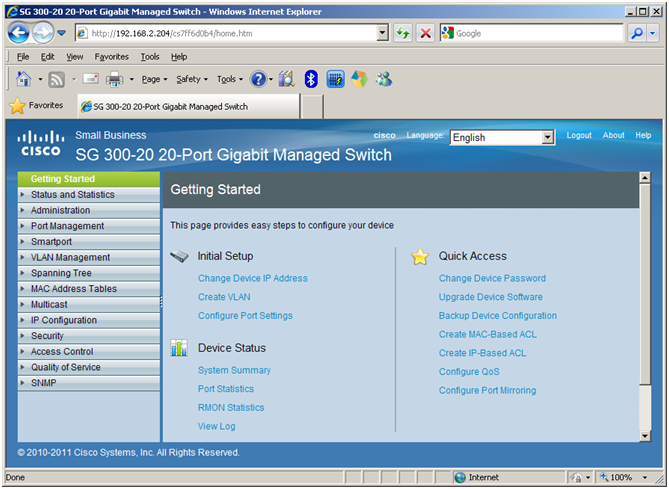
Once the system comes back browse over to the Web GUI interface.

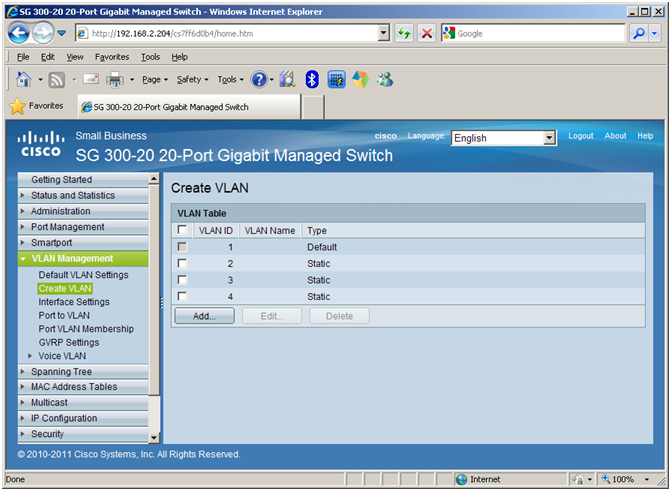
Choose “VLAN Management / Create VLAN” and enter as many VLANs as you like.

After you create the VLANs, you need to setup the IPv4 Interfaces.

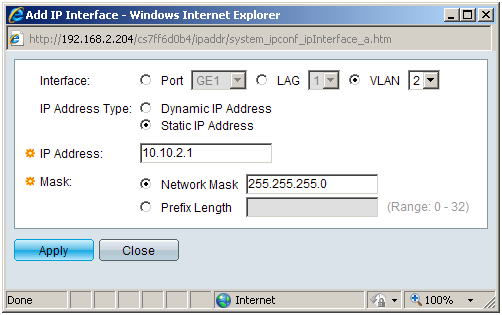
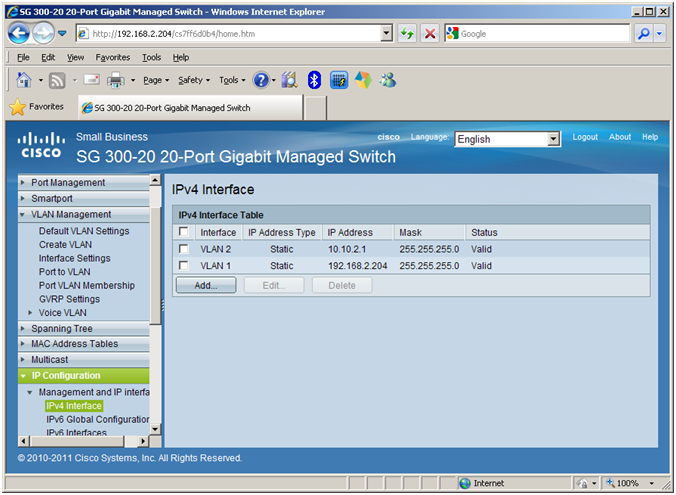
Choose “IP Configuration / IPv4 Interface” and add VLAN 2

Things should look like this

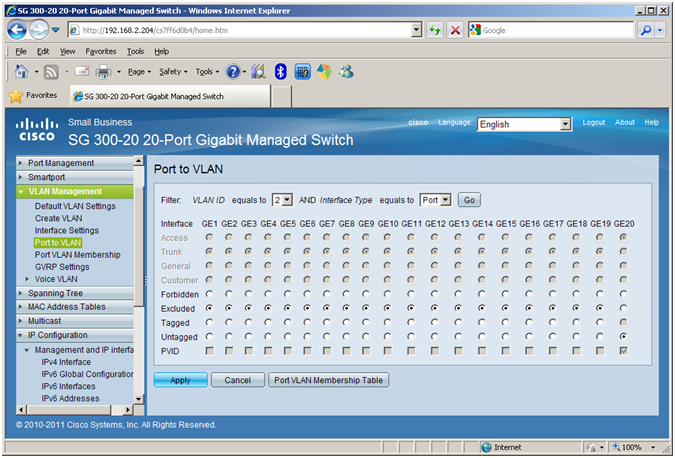
Now you want to Untag the Ports that will be included in your first VLAN.
Change your VLAN ID to 2 and hit GO.
Then untag the port that your first computer is connect to (GE20 in my case on VLAN 2)

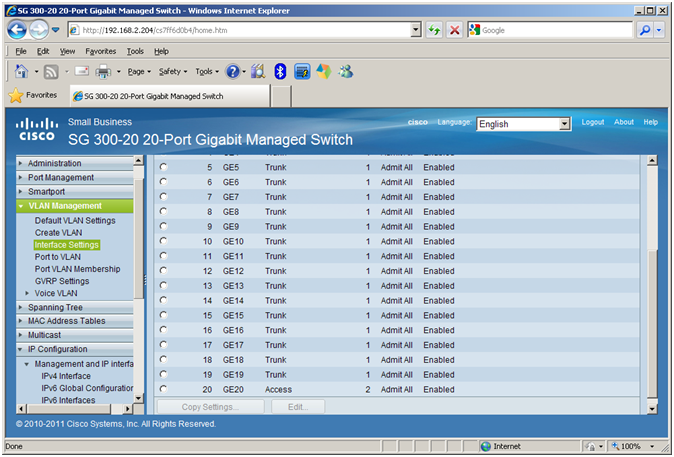
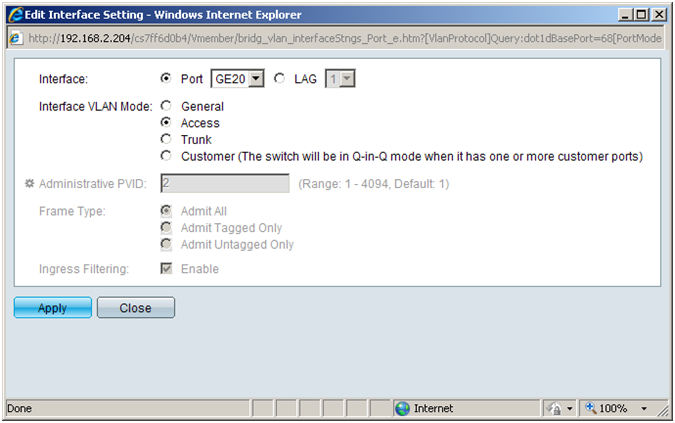
Then under “Interface Settings” you need to change the port to Mode = Access for VLANs to work properly.

Choose GE20 and Edit

Finishing Touches (Routing)

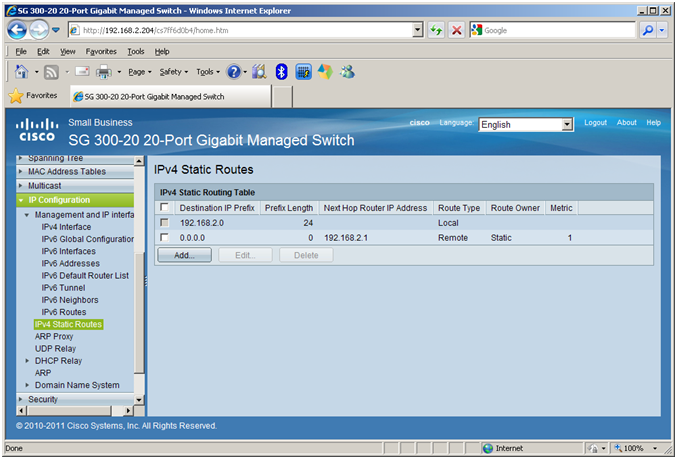
I needed to add a route to my Router using the “IPv4 Static Routes” page.

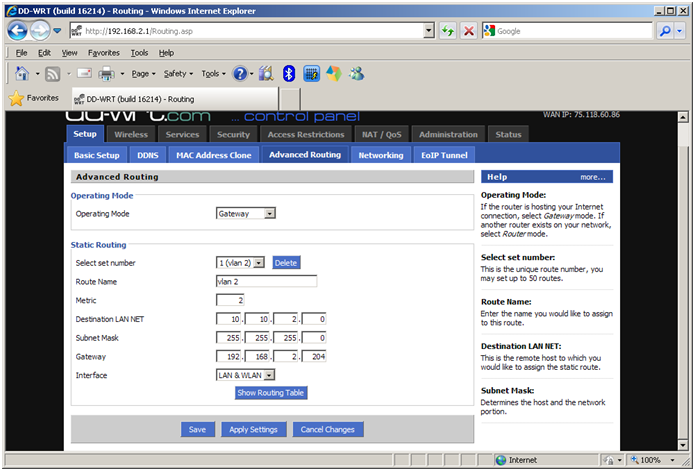
And also a reverse route on my Router which is a DD-WRT.

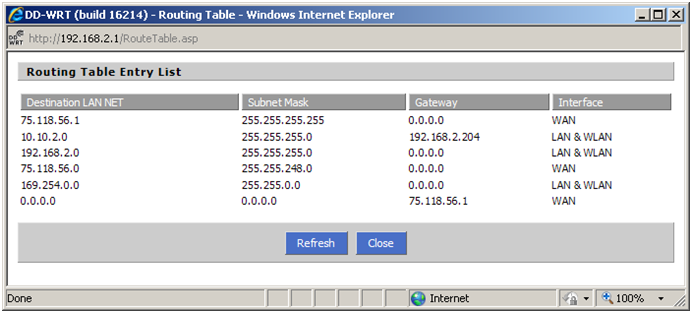
And this is my routing table on my DD-WRT


Upgrading OVM 3.0.3 to 3.1.1

Download Oracle Virtual Manager 3.1.1 and mount the iso on your manager server.

Run the runUpgrader.sh

It will ask for the “ovs” password. This was my weblogic admin password.

After upgrading your Admin Server, you should be able to put one of your Servers into Maintenance mode. This will migrate all of your VMs to the other node.

;

Load the OVM Server 3.1.1 CD ISO into your first OVM Server and boot.

My install needed an NFS or HTTP mount point to pull up the install screens. I used my local NAS server with HTTP.

3 minutes later the server was upgraded from 3.0.3 to 3.1.1. Reboot and that server is done.

Follow the same steps for your other OVM Servers and all should be good!

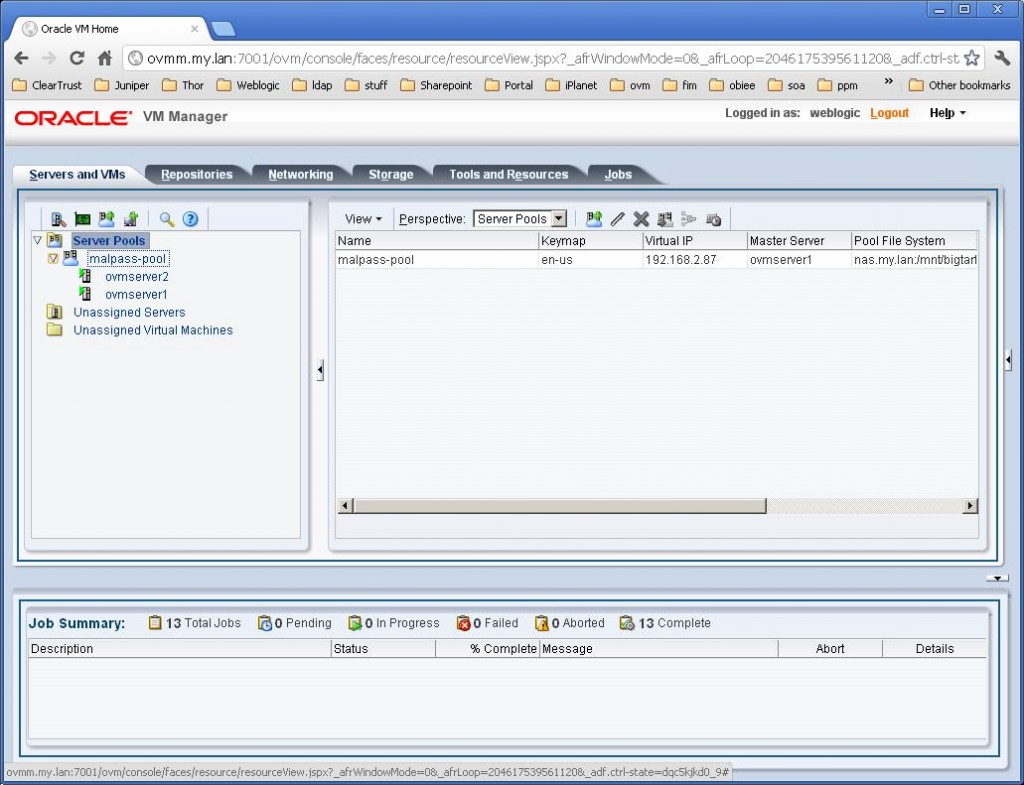
OVM Console

Enjoy

How to migrate VMWare Appliance to OVS 2.2

This explains how to migrate / convert a standard VMWare Appliance into a Oracle Virtual Server 2.2 environment.

  • Create a directory on the OVS 2.2 server under /OVS/running_pool/NewVmName
  • Unzip appliance if needed and put in the /OVS/running_pool/NewVmName
  • You should have combination of file extensions like .vmdk .vmsd .vmx .vmxf
  • Login to your OVS Manager.
  • Goto  Resources / Virtual Machine Images / Import
  • Choose ‘Select from Server Pool”
  • Your “NewVmName” should be in the listing.
  • Import and start
  • Done
  • Brewskie