
There was a problem compiling the modules for VMWare Workstation to work on Fedora 20. Turns out there was / is a bug with netfilter.

From https://wiki.archlinux.org/index.php/VMware

$ curl http://pastie.org/pastes/8672356/download -o /tmp/vmware-netfilter.patch
$ cd /usr/lib/vmware/modules/source
# tar -xvf vmnet.tar
# patch -p0 -i /tmp/vmware-netfilter.patch
# tar -cf vmnet.tar vmnet-only
# rm -r vmnet-only
# vmware-modconfig --console --install-all
Feb 20
Install VMWare Workstation on Fedora 20 64bit
Feb 20
VirtualBox install on Fedora 20 64bit
Since I always forget the details, here is how to install VirtualBox on Fedora 64bit
- Download and install VirtualBox
- Install the following required packages for /etc/init.d/vboxdrv to setup correctly
- yum install kernel-headers kernel-devel dkms
- Next run the /etc/init.d/vboxdrv setup
- You should see the following output
/etc/init.d/vboxdrv setup
Stopping VirtualBox kernel modules [ OK ]
Uninstalling old VirtualBox DKMS kernel modules [ OK ]
Trying to register the VirtualBox kernel modules using DKMS[ OK ]
Starting VirtualBox kernel modules [ OK ]
start Virtualbox
Feb 17
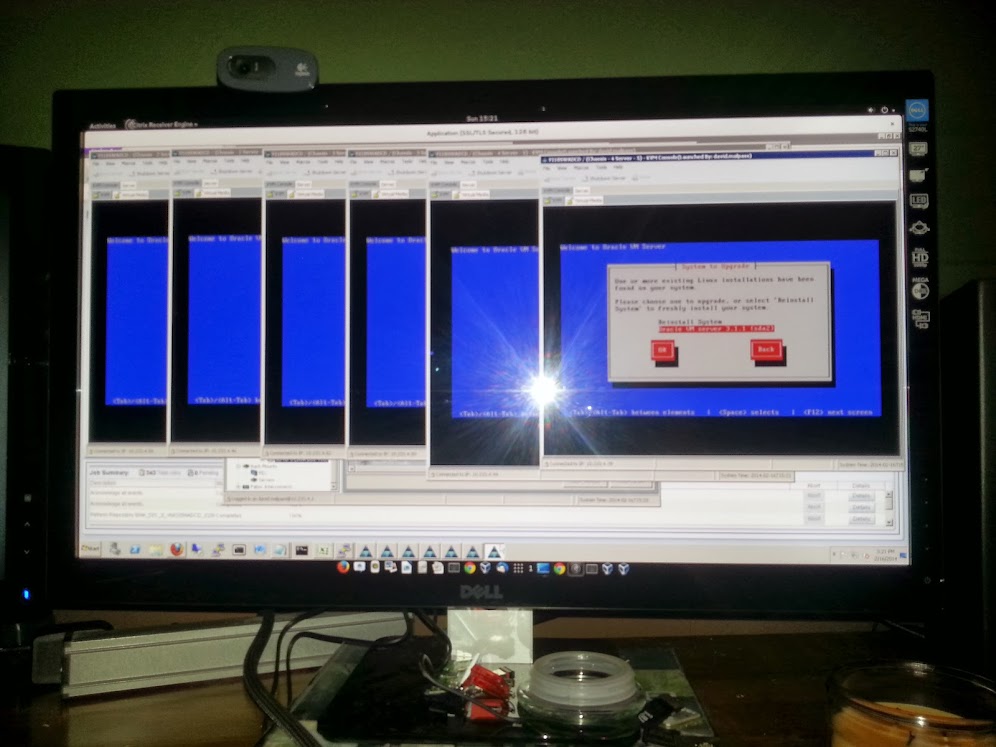
OVM 3 Mass Upgrade
Doing a mass upgrade on OVM 3.1.1 using Cisco UCS Manager. 10 servers at a time!
Feb 04
Weblogic startup scripts using “UpStart”
I previously wrote on how to create weblogic startup scripts using standard init.d scripting. There is an even easier way to do things now. Why not use upstart, which is an event based replacement for the /sbin/init daemon.
Simply create a file “wlnode.conf” and put it in the /etc/init directory. This will start the Weblogic Nodemanager. You will need to modify based on your installation of course.
1st Weblogic Server
/etc/init/wlnode.conf
start on runlevel [345]

# console output

exec /bin/su - oracle -- /u01/app/oracle/middleware/user_projects/domains/DEV_domain/bin/startWebLogic.sh
Now you want the Weblogic Admin to start as well? Create a file called wladmin.conf
/etc/init/wladmin.conf
start on runlevel [345]

# console output

exec /bin/su - oracle -- /u01/app/oracle/middleware/user_projects/domains/DEV_domain/bin/startWebLogic.sh
Do you have any instances? You can start them too. Create a file called wlinstance1.conf
/etc/init/wlinstance1.conf
start on runlevel [345]

exec /bin/su - oracle -- /u01/app/oracle/middleware/user_projects/domains/DEV_domain/bin/startManagedWebLogic.sh instance1
To start and stop and find status, simply run “start wlnode”, “stop wlnode” and “status wlnode” using whatever you named your config file in /etc/init.
If you have a cluster setup, then you need to make sure the node manager is running and configured correctly on the second server. Once that is setup, you can add the following Upstart config files to bring everything up.
Second Weblogic Server
/etc/init/wlnode.conf
start on runlevel [345]

# console output

exec /bin/su - oracle -- /u01/app/oracle/middleware/user_projects/domains/DEV_domain/bin/startWebLogic.sh
/etc/init/wlinstance2.conf
start on runlevel [345]

exec /bin/su - oracle -- /u01/app/oracle/middleware/user_projects/domains/DEV_domain/bin/startManagedWebLogic.sh instance2 http://centos.my.lan:7001
This is just a quick example and much more can be done using UpStart!
Nov 30
40″ Monitor – Black Friday Special
Well, it’s Black Friday 2013 and I managed to only spend a little. But what I got was so cool, i had to write about it…
I spend a lot of time in front of my computer, more that I would like to admit. My job basically ensures I am in front of a computer at least 5 hours a day. So, this Black Friday I splurged.

My setup consisted of a 24″ AOC Monitor next to a 27″ Dell. The Dell is beautiful but the AOC had some pixels missing and picture was so so. So, I almost made it through BF without spending the usual 1g but rounding out the night at Target of all places, I saw this one lone Magnovox Doorbuster sitting there waiting for me to take him home.
I originally was looking at at cheap Westinghouse 37″ 720p resoution for $260 or so but wasn’t completely sold. I knew that after I took it home, looking at a display of 1280×720 would not cut it.
So for $299 i picked up a 40″ 1080p Magnovox 40ME313V TV/Monitor for my PC setup. As I am typing now, let’s just say it is awesome. The screen is basically a wall in front of me and resolution, picture quality is great. My 27″ Dell looks like little bro next to this monstrous piece of electronics.
So, if you’re looking for a cool upgrade to your PC and don’t want to spend 1000+ dollars, this one for you.