
Lower your power bill using Oracle Cloud

Too Much Power

Do you want to lower your electric bills for free?

I have been locally hosting corporate level infrastructure for quite a few years. This infrastructure included rather large datacenter grade redundant virtualization servers running Proxmox. For my storage system, i was using TrueNAS providing over 6 TB of redundant storage. To connect all this, I also had a 10GB switched network. All of this required lots of power.

I wanted to say thanks to all the Opportunistic Greedy Em Effers in this country for raising prices on everything from Eggs to Energy for no apparent reason. Due to this, I was forced to look at alternate solutions. My power bills were ranging between $160-$300 monthly, which is nuts.

So being a fairly frugal individual, what could I do? Well, just like my companies I have worked for, move everything to the cloud. I set out to find a very inexpensive option for hosting outside of my house. My needs were I would say “Medium” level computing, nothing crazy. Several WordPress sites, seperate Databases, and maybe some development servers.

I review the following services

NameCheap

  • As the name says, it is kind of cheap. I moved a few of my sites over to it but since things were mostly GUI, I found it very inflexible to manage.
  • The amount of processing wasn’t enough for a reasonably fast nginx web server and a mysql database.
  • Pricing was fairly reasonable at $44 a year.. but again, i’m cheap.

Digital Ocean

  • Brought up a VM but the cost would have been around $50 a month for a single setup
  • Too much money for me

Amazon AWS

  • I use this for work everyday and find that it is overly complicated to setup and create a single Containerized Service.
  • Also, costs too much

Google Cloud Platform

  • Have used this in the past which is somewhat ok, but I also find the interface very frustrating.
  • Very low powered systems for the price

Azure

  • Also use this at work and find it not easy to work with
  • oh… and it’s Microsoft

Oracle Cloud Platform

  • The price is right! Free
  • Don’t get me wrong, I am not an Oracle fan. Most of my links to Oracle actually say “Orable” from my many experiences with Corporate Support and Sales.
  • But the services which they are providing for free is very generous and actually allowed me to move my complete workload to OCI.

  • Here’s what is included with their free tier

  • Compute: (Note- 1 Oracle OCPU = 2 vCPUs)
  • 2 AMD-based VMs: 1/8 OCPU = 0.25 vCPU with 1 GB RAM each
  • 4 Arm-based VMs: 24 GB RAM total, 3,000 OCPU hours and 18,000 GB memory hours per month
  • 2 Block Volumes Storage, 200 GB total
  • 10 GB Object Storage – Standard
  • 10 GB Object Storage – Infrequent Access
  • 10 GB Archive Storage
  • 10TB of network data egress/month per originating region
  • Resource Manager (managed terraform)
  • 5 OCI Bastions
  • 2 Oracle Autonomous Databases incl. Oracle Application Express (APEX), Oracle SQL Developer etc., each with 20GB storage
  • NoSQL Database with 25GB storage per table, up to 3 tables
  • 4 Load Balancers: 1 Flexible (10Mbps) and 3 Network
  • Monitoring and Notifications


So long story short, i packaged up my systems and moved them to Oracle Cloud Infrastructure.

For certficates, I use Free Cloudfront account to provide CDN, Certificates, Email, and Forwarding.

My new bill is 90 dollars.

Open Source CCTV system for your home

Looking for some nice software to connect all my IP cameras…. found this

Shinobi

Installation, run this on Centos

curl -s https://gitlab.com/Shinobi-Systems/Shinobi-Installer/raw/master/shinobi-install.sh

10gb fiber to my barn? Why not…

Don’t ever start looking at ebay when you are a systems engineer. You quickly find yourself convincing yourself that your home network is inadequate and should be keeping up with the multi-national infrastructure you work with day to day.

Imaging your Barn is Tokyo, your house is San Francisco… you need that 10gb connection to withstand 41 thousand simultaneous phone calls and to stream 6 terabits of media per hour! Well yes, i needed it. The man cave has needs.

So I began my research into fiber optics which admittedly I was a little behind on.

Fiber Optics vs. Coaxial Cables - The Beacon

Plan your attack

  • How far is the barn from the house
  • What type of fiber can I use
  • Do my switches support fiber?
  • What is the maximum length fiber I can run?
  • What types of connections are needed at both ends?
  • How much is this going to cost me? Am I nuts?
  • How can I get this project past the wife?

11/20 Update

Well i was able to get things purchased and installed. Here are the details

My main switch that I need to connect to is an “Arista DCS-7050T 10GBASET”

This switch has 48 10Gbe ports and 4 x 40GB QSFP+ (nuts!)

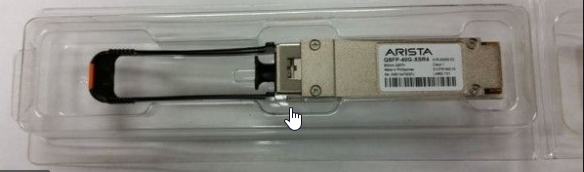
So to get fiber connected to this switch I purchased an “Arista QSFP-40G-XSR4” which is the QSFP to supply 40GB uplinks to something

Arista QSFP-40G-XSR4

Next, I needed a switch to accept fiber connects in the other building (Barn)

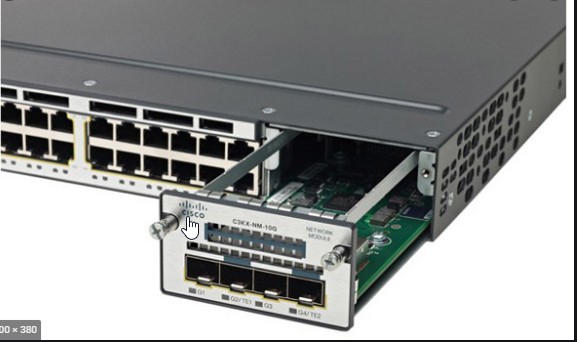
I went with a Cisco WS-CS3750X-48P. This is a pretty nice 48 x 1 GB POE switch with 4 x 10GBE uplinks. Note that these use SFP+ connections.

C3KX-SM-10G

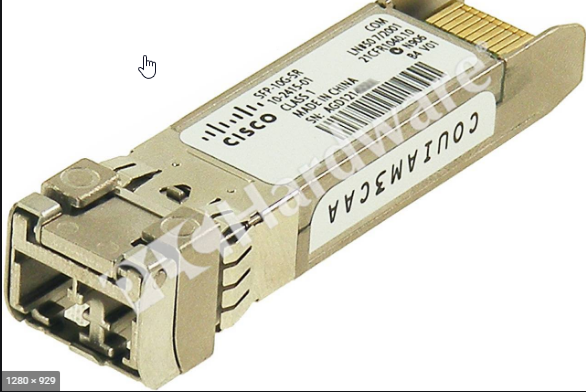
Ok, keep going, you need a connector on this side as well. I went with a standard Cisco SFP-10G-SR V03

SFP-10G-SR V03

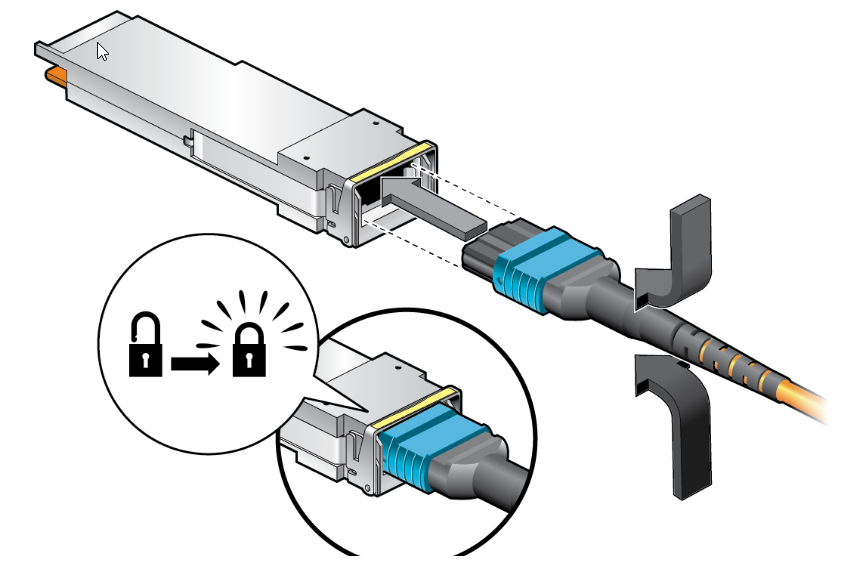
So, all the hardware is good, now let’s start looking at Fiber options. Wow, I spent many hours looking at what would work with these 2 sides. On the main Arista switch, I have that Arista QSFP-40G-XSR4 which uses a MTP fiber connector

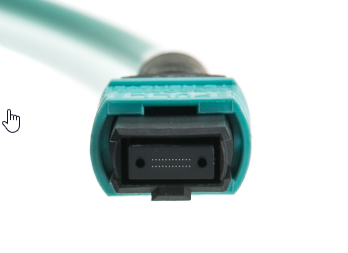
MTP and QSFP connection

The MTP connector actually has 12 fiber strands. My Arista has 40GB uplinks so how do I get the 40gb to work with the 10GB uplinks on the Cisco POE switch?

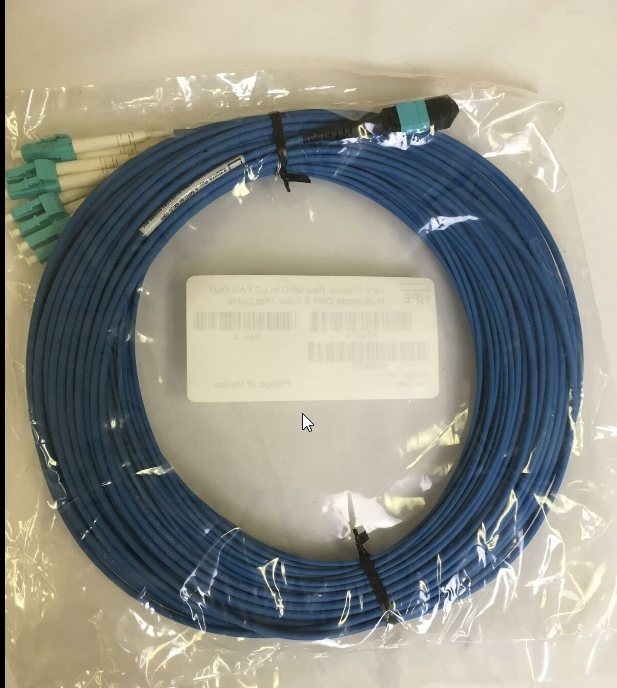
Well you need to get this fanout cable.

HPE PremierFlex OM4 Fiber Optic

This will convert the 40Gb out to 4 x 10GB SFP connections

So that is it for the hardware. This will provide 4 x 10Gb fiber links out to my barn. Even though I will only be using 1 x 10Gb link for future growth, I have some capacity obviously 🙂

Finally, let’s get digging!

The distance between my house and barn is 120 ft or so. So the cable I purchased was 50m which coverts to 165 ft.

Now more research….

  • How to get the fiber in the ground?
  • How deep?
  • Do I use a conduit?
  • What tools do I need

I decided to just bury the HP Fiber cable 4-5 inches down directly in the lawn. Using an edging shovel like this.

Using this shovel, I just “Split” the lawn as deep as possible and pushed the fiber down to the bottom of the valley

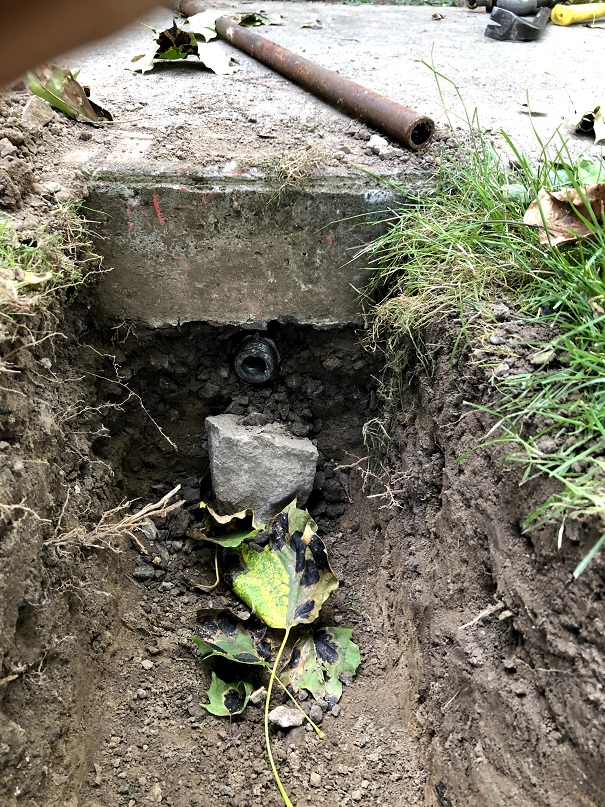
Having to go under a walkway was also interesting.

Found an old pipe and hammered it underneath the sidewalk. Then just fished the fiber through.

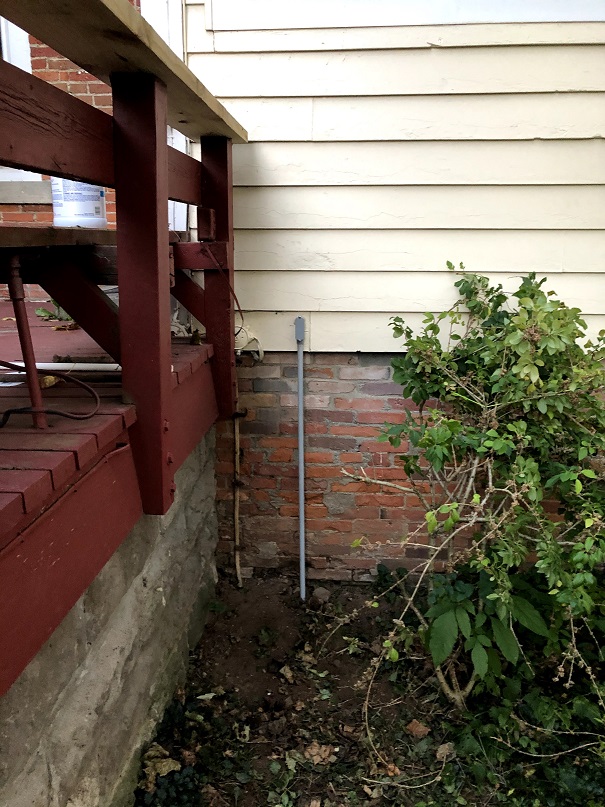
Added some conduit at each end buried 6 inches or so.

Final run to barn!

Job Done

Configure Cisco 7960 phones with Asterisk PBX

This article describe the process to configure a Cisco 7960 SIP phone with an Asterisk PBX system.

Requirements

  • Asterisk PBX or similar
  • TFTP Server
  • Cicso 7960G or similar IP phone


Asterisk Server Config

  • Create new SIP extension
    • Under “Applications / Extensions” choose Add Extension
  • Choose “CHAN SIP Device”
  • Enter User Extension: 702 (or whatever extension you want)
  • Under Secret: choose a password with at least 2 numbers
  • Click Save and Apply
  • Go back into config and make sure the Deny and Permit are set correctly
    • Deny: 0.0.0.0/0.0.0.0
    • Permit: 192.168.0.0/255.255.255.0 (or whatever matches your network)

Configure your TFTP server

  • I’m using Linux so just install a tftp-server by typing the following:
yum install tftp-server
  • the default install on Centos7 will have the tftp-server root directory under /var/lib/tftpboot
  • Put the following files in that directory

SIPDefault.cnf

SIP000A8A344598.cnf  (Fill in your MAC address after the SIPXXX.cnf)

SEP000A8A344598.cnf.xml  (Fill in your MAC address after the SEPXXX.cnf)

OS79XX.TXT

dialplan.xml

List.xml

RINGLIST.DAT

ringlist.xml

XMLDefault.cnf.xml

Install Raspbian using Linux

Raspbian Installation

Raspbian is a stripped down linux distribution that you can load on a raspberry PI. I have been using Raspberry PI’s for a number of systems in my house. The latest Raspberry PI 3 is Quad Core Broadcom BCM2837 64-bit ARMv8 processor (phew) which means it’s pretty fast. It also has WiFi built in which is HUGE (donald T) . Some uses include entertainment systems, web servers, dns servers, and phone pbx systems. So here you go:

  • Get an SD card.
  • Download latest Raspbian here.
  • Insert your SD card and get mount information.
  • Run df to find mount point and device name.
  • Unmount the SD card.
  • Format SD card in FAT 32.
sudo mkdosfs -F 32 -v /dev/mmcblk0
  • Copy .img file to SD card using dd.
sudo dd bs=1M if="/home/linux/2013-02-09-wheezy-raspbian.img" of=/dev/mmcblk0